I found this cute “from the whole class” idea at Family Fun, so I offered to make something similar for Teacher Appreciation Day at my son’s preschool, which, incidentally, is today. (Actually, it’s Teacher Appreciation Week, but I’m delivering these bouquets first thing in the morning.)
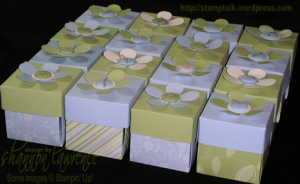
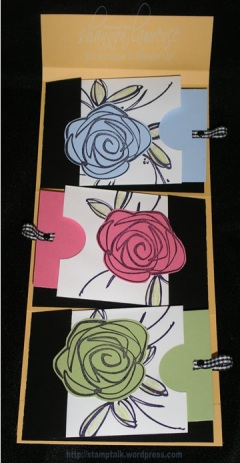
After much brainstorming and trial-and-error, I came up with what I think is a significantly improved version of the “gift-card flower.” I created a self-pocketing tulip, opted for patterned (and textured) paper, and skipped the green plant in favor of a cute metal garden planter and chocolate. Really, who wouldn’t want chocolate?

My lacking photography skills really don’t capture how charming these turned out (despite my considerably-less-than-perfect flower arranging skills, which rival only my photographic prowess–ha!), but you get the idea.

The only problem may be that there are too many flowers, which make the bouquets look a little cluttered, especially since I have so many patterns at play. Given that these particular tulips, however, are stuffed with grateful words and goodies from appreciative families, I think that’s just fine. If I were to make this bouquet for a different occasion (say, for Mother’s Day or a bridal or baby shower), I might limit the total number of tulips per planter to somewhere between 6-10 for a cleaner look, or fewer if you want the look to be crisp and modern.
Here are basic instructions to make a dozen-flower bouquet.
MATERIALS
12 pieces single-sided patterned scrapbook paper, each cut to 3-1/2″ x 7″
12 large bamboo skewers (or long floral picks)
green floral foam
medium-size garden container for base (e.g., planter, bucket, watering can, etc.)
crimping tool
adhesive tape runner
single-sided tape (e.g., Scotch tape)
individually wrapped candy
scissors
wire cutters or other tool that can cut through bamboo skewer
Optional: large corner rounder
12 pieces of cardstock, cut to 2-3/4″ x 7-1/2″
small corner rounder
INSTRUCTIONS

With wire cutters, trim bamboo skewers on flat end as follows: trim 2″ from 2 skewers, 3″ from 2 skewers, and 4″ from 1 skewer. Leave all remaining skewers at full length.
For each tulip, score patterned paper sheet at 4-1/2″ on the long side. Adhere tape runner (glue) to edges only of the smaller section. Hint: to create a narrow adhesive strip with a standard size tape runner, place papers tightly side-by-side (patterned side down) and apply tape runner to seam. Then separate and continue. Fold at score mark and press glued area shut, creating a pocket. Fold pocket in half lengthwise (without a hard crease). Use scissors (or large corner rounder) to round bottom (folded side of pocket) and cut tips of petals at opposite end by cutting what is essentially a curvy “V.” (I personally prefer the variation that comes from cutting freehand, but if you really, really don’t think that you can do this without a template, leave a comment and I’ll try to post something to share.) Unfold and run through paper crimper. This texture adds a nice dimension, hides any creases that may have been created, and helps to give the flower a more curvy shape.

To assemble flowers, run pointed end of skewer through middle of pocket and poke through bottom. Use a piece of Scotch tape to adhere top of skewer to inside front of the pocket. Do not adhere to back or flower will fall forward. Hint: if using multiple patterns, determine flower arrangement prior to inserting different length skewers.

To create the card insert, score the cardstock on the long side at 3-3/4″ and fold in half. Use corner rounders to snip the corners on the non-fold edge. Write a note, decorate the card, insert gift card or other small, flat favor, and insert, open-end down into flower pocket. Optional: some gift card holders are small enough to fit inside the pocket without protruding and you can write a note on the blank side of the gift card holder instead of making a card insert.
To assemble flowers in container, first fill container with floral foam, leaving 1-2″ of space at top of container. Arrange flowers by inserting skewers firmly into foam. Use flowers with shorter skewers at the front and fill in with progressively longer “stems” towards the back. Once completed, arrange candy to hide foam.
SUNFLOWERS

I also wanted to thank a few special staff who have been so very kind and loving to my son, so I whipped up a handful of single-stemmed options just from our family. The inspiration for these came from my former flower creations like chocolate vases, in which I created flowers from assembling punched shapes. This simple sunflower is made from 20 oval punches (petals), 2 large circle die-cuts (center), and medium and large oval tag die-cuts (leaves, which fell down for this photo, but normally sit somewhat upright). I particularly love the way the thinner single-sided scrapbook paper lets the light shine through.
There are about a million ways to vary these ideas, so feel free, as always, to CASE (copy and share everything). Please just link to this page and give credit to the concept (Family Fun) and my original designs. Enjoy!

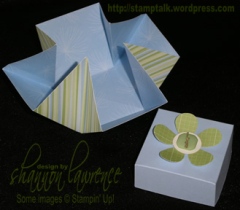
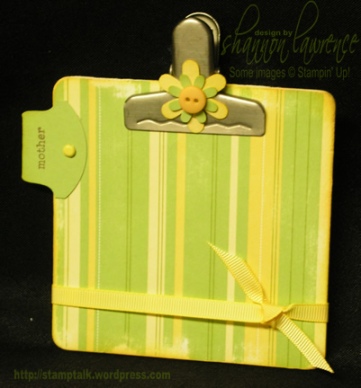
 Mini Cork Board – Click here for instructions
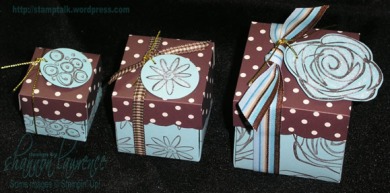
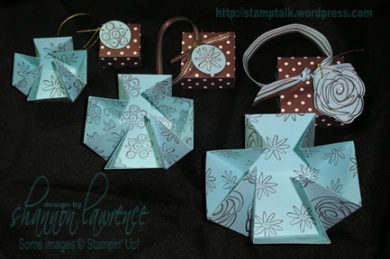
 Explosion Box – Click here for instructions